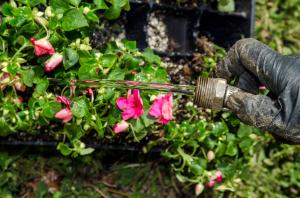
How to Plant Bare Root Roses
Planting bare root roses can seem intimidating, but it is actually quite easy with the right tools and knowledge. Follow these steps to successfully plant your bare root roses and watch them bloom into beautiful, fragrant flowers.
Step 1: Choose a Planting Location
Before planting, choose an ideal location for your roses. They need at least six hours of sunlight per day and well-draining soil. Avoid planting in areas with strong winds or where water tends to collect.
Step 2: Soak the Roots
Soak the roots of your bare root roses in a bucket of water for several hours before planting. This will help to rehydrate the roots and prepare them for planting.
Step 3: Dig a Hole
Dig a hole that is wider and deeper than the roots of your rose. Make sure the hole is deep enough so that the graft union is at least two inches below the soil line.
Step 4: Add Fertilizer and Soil Amendments
Add a slow-release fertilizer and any necessary soil amendments to the bottom of the hole. Mix the fertilizer and amendments with the soil to ensure even distribution.
Step 5: Position the Rose
Carefully position the rose in the center of the hole, making sure the roots are spread out and not cramped. The graft union should be at least two inches below the soil line.
Step 6: Fill the Hole
Fill the hole with soil, making sure to tamp it in lightly to remove any air pockets. Create a small mound of soil around the base of the rose to help water flow towards the roots.
Step 7: Water and Mulch
Water your newly planted rose thoroughly and add a layer of mulch around the base of the plant to help retain moisture and control weeds.
Step 8: Prune
After planting, prune your bare root rose back to about six inches above the graft union. This will encourage new growth and help the rose establish itself.
Step 9: Care and Maintenance
Continue to water and fertilize your rose throughout the growing season. Deadhead spent blooms to encourage new growth and remove any damaged or diseased branches promptly.
In conclusion, planting bare root roses may seem daunting, but with the proper steps, it can be a simple and rewarding process. Choose a proper location, soak the roots, dig a hole, add fertilizer, position the rose, fill the hole, water and mulch, prune, and finally care for your newly planted rose throughout the season. With a little bit of attention and patience, you can enjoy beautiful roses in your garden year after year.

 how many times do yo...
 how many planted tre...
 how many pine trees ...
 how many pecan trees...
 how many plants comp...
 how many plants can ...
 how many plants and ...
 how many pepper plan...


