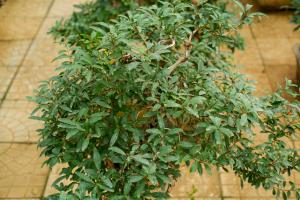
How to Make Plant Pots Out of Wood
Wooden plant pots are a great addition to any garden or home, and they can be a fun project to make. In this article, we will walk through the steps to create your own wooden plant pots.
Materials Needed
To make your own wooden plant pots, you will need the following materials:
Wood boards
Saw
Measuring tape
Sandpaper
Wood glue
Nails or screws
Drill
Step-by-Step Guide
Step 1: Cut the Wood Boards
The first step is to cut the wood boards into the desired size for your plant pots. You may want to consider using a saw that is designed for cutting wood, such as a circular saw or a jigsaw. Be sure to measure the boards carefully to ensure that they are the correct size.
Step 2: Sand the Boards
Once you have cut the boards to size, you will need to sand them to create a smooth surface. This will help the wood glue adhere better and will give your wooden plant pot a nicer finish. Use sandpaper to sand the boards, starting with a coarse grit and gradually moving to a finer grit.
Step 3: Glue the Boards Together
Next, you will need to apply wood glue to the edges of the boards and press them together. Be sure to clamp the boards tightly and let the glue dry completely before moving on to the next step.
Step 4: Drill Drainage Holes
The next step is to drill drainage holes in the bottom of the wooden plant pot. Use a drill bit that is appropriate for the size of your plant pot, and be sure to drill the holes evenly spaced apart.
Step 5: Finish the Plant Pot
Once you have drilled the drainage holes, you can sand the edges to smooth them out. You can also add any additional decor or finish that you desire, such as paint or stain.
Tips and Tricks
Choose a wood that is appropriate for outdoor use, such as cedar or redwood.
Consider adding feet to your wooden plant pot to lift it off the ground and improve drainage.
If you don't have access to a saw, many hardware stores or lumber yards will cut the wood for you.
Making your own wooden plant pots can be a fun and rewarding project. With a little time and effort, you can create beautiful and functional plant pots that will last for years to come.

 how many times do yo...
 how many planted tre...
 how many pine trees ...
 how many pecan trees...
 how many plants comp...
 how many plants can ...
 how many plants and ...
 how many pepper plan...


