How to Make Clay Pots for Plants
If you're looking for a fun and creative way to add some homemade charm to your gardening, why not try making clay pots for your plants? With just a few tools and some creativity, you can create beautiful and unique containers to house your favorite flowers and greens. Here's how to get started.
Step 1: Gather Your Materials
First, you'll need to gather your materials. This includes:
Clay
A potter's wheel (or a surface to work on if you're hand-building the pots)
A kiln (if you plan on firing the pots)
A scraper or wooden rib
A needle tool
A sponge
A bucket of water
Step 2: Prepare Your Clay
Before you start making your pots, you'll need to prepare your clay. Start by wedging the clay, which is the process of kneading it to get rid of air bubbles and create a uniform consistency. You can do this by hand or with a machine. Once the clay is wedged, cover it in plastic to prevent it from drying out while you work.
Step 3: Form Your Pot
Now it's time to start forming your pot. If you're using a potter's wheel, start by centering the clay on the wheel and slowly pulling up the walls of the pot with your hands. Use a sponge to keep the clay moist, and a scraper or wooden rib to smooth out any bumps or ridges. If you're hand-building the pot, start by forming a base and building up the walls with coils or slabs of clay.
Step 4: Add Details
Once your pot is formed, you can add any details you'd like. This might include carving designs into the clay with a needle tool, adding decorative handles or feet, or using stamps or other tools to create texture.
Step 5: Let Your Pot Dry
After you've finished forming and decorating your pot, it's time to let it dry. Depending on the size and thickness of your pot, this could take several days or even a week or more. Be patient, as rushing the drying process could cause your pot to crack or break.
Step 6: Fire Your Pot (Optional)
If you're using a clay that requires firing in a kiln, you'll need to do this step before you can use your pot for plants. Follow the instructions for your specific clay, as firing times and temperatures can vary. Once your pot is fired, it will be much stronger and more durable.
Step 7: Add Your Plants!
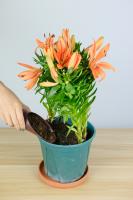
Finally, it's time to add your plants to your new clay pot. Be sure to choose plants that are appropriate for the size and shape of your pot, and that have similar light and water requirements. Once your plants are settled in, place your pot in a sunny spot and enjoy!
Making clay pots for plants is a fun and rewarding DIY project that can add a personal touch to your gardening. With a little practice and creativity, you can create beautiful and functional containers that will brighten up any space.

 how many times do yo...
 how many planted tre...
 how many pine trees ...
 how many pecan trees...
 how many plants comp...
 how many plants can ...
 how many plants and ...
 how many pepper plan...


