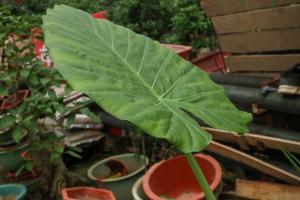
How to Make a Water Bottle Plant Waterer
Plants need water to survive, and as busy people, we often forget or don't have time to water them regularly. This is where a water bottle plant waterer comes in handy. It is simple to make, easy to use, and effective in keeping your plants healthy. Here is how to make one:
Materials Needed
A plastic water bottle
A pair of scissors or a knife
A drill or a hot needle
A wick or cotton string
Once you have all the materials, follow these steps:
Step 1: Prepare the Water Bottle
Clean and dry the water bottle. Remove the label and the cap. Then, using a pair of scissors or a knife, cut off the bottom of the bottle. The height of the bottle should be at least 6 inches, and the diameter should be wide enough to fit over the plant pot without it falling inside.
Step 2: Make the Water Release Hole
Using a drill or a hot needle, pierce a small hole near the cap of the water bottle. The hole should be big enough for the wick to go through, but not too big that it will release water too quickly. Experiment with different sizes until you get the desired water flow.
Step 3: Insert the Wick
Thread the wick or cotton string through the hole and let it hang inside the bottle. The wick should be long enough to reach the bottom of the water bottle and touch the water. You can use different materials for the wick, such as a shoelace or a piece of wool. The purpose of the wick is to absorb the water and transfer it to the plant pot slowly.
Step 4: Plant the Water Bottle Waterer
Fill the water bottle with clean water, and then put the plant pot on top of the bottle, with the wick going through the soil. The wick should be touching the soil but not too deep that it will block the flow of water. Make sure the plant pot is stable and won't topple over. If you have a large plant, you can use multiple water bottles and wicks.
Step 5: Observe and Refill
Observe your plants for any signs of overwatering or underwatering. To refill the water bottle, simply remove the plant pot and pour clean water into the bottle. You can adjust the length and thickness of the wick depending on the needs of your plants. With a water bottle plant waterer, you can now enjoy healthy plants without worrying too much about watering them regularly.
Conclusion
A water bottle plant waterer is a simple but effective tool in keeping your plants healthy. With just a few materials and a little effort, you can make your own water bottle plant waterer and enjoy the benefits of having greenery in your home or garden. Just remember to refill the water bottle regularly and adjust the wick to suit your plants' needs. Happy gardening!

 how many times do yo...
 how many planted tre...
 how many pine trees ...
 how many pecan trees...
 how many plants comp...
 how many plants can ...
 how many plants and ...
 how many pepper plan...


