How to Make a Fairy Garden in a Plant Pot
Creating a fairy garden in a plant pot is a wonderful way to invite a bit of magic into your home or office. These miniature gardens can be made in just about any size of plant pot and can be customized with your favorite fairy figurines, plants, and accessories. Here are some simple steps to get you started with making your very own fairy garden in a plant pot.
Step 1: Choose Your Plant Pot
First things first, select the perfect plant pot for your fairy garden. It can be a simple terra cotta pot or a more ornate and decorative one. The size of the pot will depend on how large or small you want your fairy garden to be. Make sure the pot has drainage holes at the bottom for proper water drainage.
Step 2: Add Drainage Materials
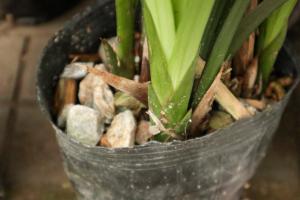
Once you have your pot, add some drainage materials like small stones, gravel, or pebbles to the bottom. This will help promote drainage and prevent the soil from becoming waterlogged.
Step 3: Mix the Soil
Mix a good quality potting soil with some compost for added nutrients. This will be the base for your fairy garden. You can also add some sand to improve drainage, especially if your pot does not have a lot of drainage holes.
Step 4: Plan Your Garden Layout
Before adding plants and accessories, plan out the layout of your fairy garden. Consider where you want to place your fairy figurines, tiny houses, or other decorations. Create a path or walkway using small pebbles or stones and place larger plants in the back and smaller ones in the front.
Step 5: Add Plants and Accessories
Begin planting your fairy garden starting with the larger plants and trees in the back. Add smaller plants in the front and sides. Make sure to leave enough space for your accessories and decorations. You can add a small watering can, a tiny garden bench, or even a miniature fence to add realism to your fairy garden.
Step 6: Add the Final Touches
Once you have everything in place, you can add the final touches to your fairy garden. This can include adding fairy figurines, fairy houses, or other accessories. You can also add some fairy lights to create a magical and enchanting atmosphere.
Care Tips
Make sure to water your fairy garden regularly and keep it in a location that receives proper sunlight. Avoid overwatering as this can cause root rot. Trim back any plants that get too big and remove any dead leaves or flowers.
With these simple steps, you can create a beautiful and magical fairy garden in a plant pot that is sure to delight and inspire anyone who sees it. Get creative with your plant selection and accessory choices to make your fairy garden truly unique and special.

 how many times do yo...
 how many planted tre...
 how many pine trees ...
 how many pecan trees...
 how many plants comp...
 how many plants can ...
 how many plants and ...
 how many pepper plan...


