How to Hang Plant Pots on a Fence
If you want to add more greenery to your fence or outdoor space, hanging plant pots is a great way to do it. Hanging plant pots can add a pop of color and a natural touch to your fence without taking up any ground space. Here are some simple steps on how to hang plant pots on a fence.
Step 1: Choose Your Hanging Planters
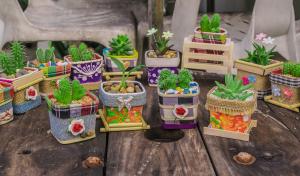
The first step is to choose the hanging planters you want to use. There are a variety of options available, including traditional clay or plastic pots, macrame hangers, metal baskets, or even repurposed items like old tea kettles or mason jars. Choose planters that fit the style of your fence and the plants you want to display.
Step 2: Select Your Plants
Once you have your planters picked out, it's time to choose the plants you want to display. Consider the amount of sunlight and shade the fence receives, as well as the climate in your area. Some great plants for hanging planters include trailing ivy, succulents, or flowers like petunias or fuchsia.
Step 3: Hang Your Planters
Before you hang your planters, make sure to measure the space on your fence and choose spots that get sufficient sunlight. Then, follow the instructions that came with your specific planters to hang them securely on the fence. Some planters require hooks or screws to be drilled into the fence, while others may have built-in hangers. Make sure to hang the planters at a height that makes it easy to water and maintain them.
Step 4: Water and Care for Your Plants
Once your planters are hung, it's time to care for your plants. Water your plants as needed depending on the specific plant and the weather conditions. Make sure to check the soil at least once a week to see if it's dry. If the soil is dry to the touch, it's time to water your plants. You can also add fertilizer to the soil periodically to help your plants thrive.
Step 5: Enjoy Your Hanging Garden
Now that you have your hanging planters set up and your plants are thriving, it's time to enjoy your hanging garden! Step back and admire the colorful blooms and the natural touch they bring to your fence. You can also get creative and add different types of plants or switch out planters depending on the season.
In conclusion, hanging planters can add a beautiful touch to your fence or outdoor space. By choosing the right planters and plants, hanging them securely, and caring for them properly, you can have a flourishing hanging garden in no time.

 how many times do yo...
 how many planted tre...
 how many pine trees ...
 how many pecan trees...
 how many plants comp...
 how many plants can ...
 how many plants and ...
 how many pepper plan...


