How to Ground a Potted Plant
If you're a plant lover and enjoy growing plants indoors or outdoors, you may encounter situations where grounding a potted plant is necessary. Grounding simply means connecting the roots of a potted plant with the soil by removing the potting mix and planting the plant in the ground. This process provides the plant with a stable environment and access to more nutrients to thrive. In this article, we'll discuss how to ground a potted plant in easy steps.
Step 1: Choose the Right Time to Ground a Potted Plant
Grounding a potted plant is best done when the plant is in its dormant stage or has not grown too extensively. Generally, you should aim to ground your potted plant in the early stages of growth. This will allow the plant to flourish and form strong roots that will support it for its entire lifetime.
Step 2: Choose a Location to Ground Your Potted Plant
The location you choose for your potted plant needs to be suitable for the type of plant you're growing. Ideally, choose an area that is exposed to sunlight and has good drainage. A location in the shade may also be ideal if you're growing a plant that thrives in such conditions.
Step 3: Prepare the Ground for Planting
Before planting, prepare the ground for the plant by digging a hole that is slightly larger than the size of the plant's root ball. Ensure that the hole's depth is at least two times the height of the plant's root ball. This will ensure that the plant gets adequate support from the soil.
Step 4: Move the Plant from the Pot to the Ground
After digging the hole, remove the plant from the pot by gently tapping the sides of the pot, or cutting the potting material away. When the potting mix is removed, you should be able to remove the root ball carefully. Be sure not to damage the roots when handling them. Place the plant in the hole and cover its roots with soil, ensuring that it is level with the ground.
Step 5: Water Your Plant Regularly
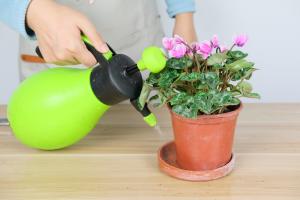
After planting, water your plant thoroughly, and ensure that the soil is well-drained. Make sure you water your plant regularly, especially during the first few weeks after planting. This will help the plant to acclimatize to its new environment and support its growth.
Step 6: Fertilize Your Plant
In addition to watering your plant regularly, you should also fertilize it to provide it with the necessary nutrients for growth. You can do this by applying a balanced fertilizer according to the manufacturer's instructions. Apply the fertilizer about six inches away from the plant's stem, and avoid applying it directly to the plant's base to prevent burning its roots.
Conclusion
Grounding a potted plant is an essential process that ensures the plant thrives and is well-nourished. By following these simple steps, you can successfully ground your potted plant and enjoy the beauty it brings to your garden or home. Remember to choose the right time to ground your plant, choose a suitable location, prepare the ground for planting, move the plant from the pot to the ground, water it regularly, and fertilize it to provide it with the necessary nutrients it needs for growth.

 how many times do yo...
 how many planted tre...
 how many pine trees ...
 how many pecan trees...
 how many plants comp...
 how many plants can ...
 how many plants and ...
 how many pepper plan...


