How to Stake a Rubber Tree Plant
Staking is an essential process when it comes to growing a rubber tree plant. It ensures that the plant is well-supported as it grows taller and heavier. Staking will ensure that your rubber tree grows straight and healthy. In this guide, we will provide you with a step-by-step process on how to stake a rubber tree plant.
Step 1: Selecting the Stake
The first step in staking a rubber tree plant is selecting the right stake. The stake you choose should be sturdy and robust enough to support the plant's weight. A bamboo, wooden or metal stake can do the job well. The stake should be at least two feet taller than your rubber plant. This extra height allows the plant to grow up without reaching the stake's top, which could cause it to bend.
Step 2: Placing the Stake
The second step in the process of staking is placing the stake in your rubber plant's pot. Place the stake 2-3 inches away from your plant's stem. Ensure that the stake is stable and won't move even when the plant grows taller or heavier. Use a hammer to drive the stake into the soil until it is firmly rooted in the pot.
Step 3: Securing the Plant to the Stake
Now that you have placed the stake in the pot, you need to secure your rubber plant to it. Begin by fastening the plant to the stake. You can use tape, twine, or soft fabric to secure the plant to the stake gently. Wrap the tape or twine around the stem of the plant and then to the stake. But, be gentle to avoid injuring the stem.
Step 4: Adjusting the Plant's Position
After securing the plant to the stake, check if its position is straight. If it's slightly bent, adjust the plant's position gently to be straight. Take care not to move the stake, which can cause harm to the plant's root. Also, don't apply too much force to the plant's stem as it can cause an injury in the stem.
Step 5: Watering and Monitoring the Plant
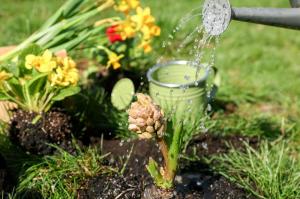
After staking and adjusting the plant's position, water it thoroughly, and monitor its growth. Check the plant regularly to ensure that it is growing straight and is not putting any pressure on the stake. Over time, your plant will grow taller and heavier, potentially bending or placing stress on the stake. Check the plant after every two weeks to adjust the ties or to replace the tape that has loosened.
Conclusion
In conclusion, staking a rubber tree plant is essential in ensuring that the plant grows straight, healthy, and robust. Select the right stake, place it in the pot, and secure the plant gently to the stake. Also, monitor and adjust the plant regularly to maintain its position. With these simple steps, you can quickly stake your rubber plant and provide it with the support it needs to grow tall and beautiful.

 how many times do yo...
 how many planted tre...
 how many pine trees ...
 how many pecan trees...
 how many plants comp...
 how many plants can ...
 how many plants and ...
 how many pepper plan...


