How to Cage an Already Fully Grown Cherry Tomato Plant
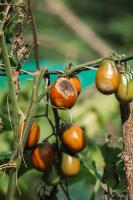
Cherry tomato plants are a delightful addition to any garden, and when they are fully grown, they can produce a bountiful harvest of sweet, juicy fruits. However, if you don't provide proper support for your cherry tomato plant, it can fall over, break, or become vulnerable to pests and diseases. One of the most effective solutions to this problem is to cage your fully grown cherry tomato plant. It's easy to do so, and this article will guide you through the process.
Step 1: Choose the Right Cage
Before you can cage your cherry tomato plant, you need to select the right cage for the job. There are many different types of cages available, but you want to make sure you get one that is sturdy, tall enough, and wide enough for your fully grown cherry tomato plant. Look for cages that are made of durable materials, such as metal or heavy-duty plastic, and have a diameter of at least 18 inches and a height of at least 4-5 feet.
Step 2: Position the Cage
Once you have chosen the right cage, it's time to position it around your fully grown cherry tomato plant. The best time to do this is when the plant is still relatively small, as it will be easier to maneuver it into the cage. However, if your plant has already outgrown its pot or garden bed, you can still cage it. Carefully lift the plant and gently place it into the center of the cage. Make sure the cage is centered around the main stem and that the branches are evenly distributed inside the cage.
Step 3: Secure the Cage
Now that the cage is in place, it's time to secure it. Most cages have legs or prongs that you can push into the soil to anchor them securely in place. However, if you want extra stability, you can also use stakes to reinforce the cage. Simply drive the stakes into the ground around the cage and tie them to the cage with garden twine or wire. This will prevent the cage from toppling over in strong winds or if the plant becomes too heavy with fruit.
Step 4: Prune the Plant
One of the benefits of caging your cherry tomato plant is that it makes it easier to prune and manage the plant's growth. Once the plant is secured in the cage, take a moment to remove any sucker shoots or branches that are growing below the first flower cluster. These can sap energy from the main stem and reduce fruit production. Also, trim any diseased or damaged branches, and remove any leaves that are blocking sunlight from the fruits.
Step 5: Monitor and Water the Plant
Now that your fully grown cherry tomato plant is caged and pruned, it's important to monitor its growth, inspect it for pests and diseases, and water it regularly. Check the soil moisture level daily, and water the plant deeply whenever the top inch of soil feels dry. Don't overwater, as this can lead to root rot and other problems. Also, check the plant regularly for aphids, spider mites, and other pests, and treat them promptly with insecticidal soap or other organic remedies.
Final Thoughts
Caging an already fully grown cherry tomato plant may seem daunting, but it's actually a straightforward process that can yield many benefits. By choosing the right cage, positioning it correctly, and securing it in place, you can provide your plant with the support it needs to thrive. Additionally, by pruning and monitoring your plant regularly, you can maximize its fruit production and prevent problems from arising.

 how many times do yo...
 how many planted tre...
 how many pine trees ...
 how many pecan trees...
 how many plants comp...
 how many plants can ...
 how many plants and ...
 how many pepper plan...


