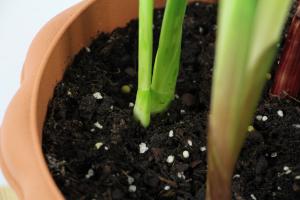
When to Repot Spider Plant
Spider plants are popular indoor plants due to their easy-to-care-for nature and attractive foliage. However, as with all plants, they eventually outgrow their containers and need to be repotted. Knowing when to repot your spider plant is crucial to keeping it healthy and thriving. In this article, we will discuss the signs that your spider plant needs repotting and the steps to successfully repotting it.
Signs Your Spider Plant Needs Repotting
1. Roots Coming Out of the Drainage Holes
The first sign that your spider plant needs repotting is when you start to see its roots emerging from the drainage holes at the bottom of the container. This indicates that the plant has outgrown its current container and needs more space for its roots to spread.
2. Stunted Growth and Yellowing Leaves
Another sign that your spider plant needs repotting is when you notice stunted growth and yellowing leaves. This can be an indication that the plant is becoming root-bound and there is not enough room for its roots to absorb nutrients from the soil.
3. Soil Drying Out Quickly
If you have to water your spider plant more frequently than usual, it could be a sign that the roots have overtaken the soil and there is not enough soil to hold water. This can lead to the plant becoming dehydrated and eventually dying.
Steps to Repotting Your Spider Plant
1. Choose a Bigger Container
When selecting a new container, make sure it is slightly larger than the current one to allow room for the roots to spread. Choose a container that has drainage holes at the bottom to prevent water from accumulating and causing root rot.
2. Prepare the Soil
Fill the new container with fresh potting soil, leaving enough room at the top for the roots of the spider plant. Mix in some slow-release fertilizer to provide the plant with nutrients as it grows.
3. Remove the Spider Plant from the Old Container
Gently tip the old container on its side and slide the spider plant out, being careful not to damage the roots. If the plant is root-bound and the roots are tightly packed, use a clean pair of scissors to carefully cut away some of the roots to promote growth in the new container.
4. Plant the Spider Plant in the New Container
Place the spider plant in the new container and fill any gaps with fresh potting soil. Press the soil down firmly to ensure good root-to-soil contact. Water the plant thoroughly to settle the soil and to help the plant establish itself in its new surroundings.
Conclusion
Repotting a spider plant is essential to its growth and health. Knowing when to repot and following the proper steps is crucial to ensuring a successful transplant. With the right care, your spider plant will continue to thrive and beautify your indoor space for years to come.

 how many times do yo...
 how many planted tre...
 how many pine trees ...
 how many pecan trees...
 how many plants comp...
 how many plants can ...
 how many plants and ...
 how many pepper plan...


