How to Repot Rubber Plant
Rubber plants, also known as Ficus elastica, are a popular indoor plant due to their attractive foliage and ease of care. As with many houseplants, rubber plants will eventually outgrow their container and require repotting to continue thriving. In this article, we will outline how to repot your rubber plant in a few easy steps.
Step 1: Choose the Right Container
The first step in repotting your rubber plant is to select a container that is slightly larger than its current one. A container that is too large may lead to overwatering and root rot. Make sure the new container has drainage holes to allow excess water to escape.
Step 2: Prepare the Plant
The second step is to prepare the rubber plant for repotting. Water the plant a few days before you plan to repot it to make the soil easier to work with. Carefully remove the rubber plant from its current container, taking care not to damage the roots in the process. Gently loosen any compacted soil around the roots.
Step 3: Add New Soil
Once you have taken the plant out of its old container, you can add fresh soil to the new one. You can use regular potting soil or mix in some perlite to improve drainage. Add enough soil to the bottom of the new container to raise the rubber plant to its previous level, making sure the roots are spread out evenly.
Step 4: Repot the Plant
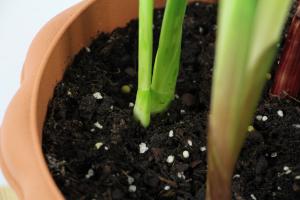
The fourth step is to repot the rubber plant into its new container. Place the plant in the center of the new pot and gently fill in the remaining spaces with soil. Tamp down the soil lightly around the plant to remove any air pockets. Leave a small amount of space at the top of the container to allow for watering.
Step 5: Water the Plant
The final step is to water the rubber plant thoroughly. Water the plant until water begins to drain from the bottom of the container. Be careful not to overwater the plant, as this can lead to root rot. After watering, be sure to empty the saucer underneath the container to prevent the plant from sitting in standing water.
In conclusion, repotting a rubber plant is a straightforward task that can be easily done at home. Following these simple steps will help ensure that your rubber plant continues to grow and thrive. Remember to choose the right container, prepare the plant, add new soil, repot the plant, and water it thoroughly. With a little bit of care, your rubber plant can provide you with years of enjoyment.

 how many times do yo...
 how many planted tre...
 how many pine trees ...
 how many pecan trees...
 how many plants comp...
 how many plants can ...
 how many plants and ...
 how many pepper plan...


