How to Repot an Aloe Plant
Aloe plants are among the most popular houseplants in the world. Their succulent leaves and low-maintenance requirements make them a favorite among beginners and experienced horticulturists alike. Repotting an aloe plant is an essential task that should be done every year or two to ensure that the plant continues to grow and thrive. In this article, we will guide you step-by-step on how to repot an aloe plant.
Preparing for Repotting
The first step is to prepare the materials and tools that you will need for repotting. You will need a new pot, potting mix, gardening gloves, and a trowel or a spoon. Make sure that the new pot is slightly larger than the current one to give the aloe plant enough room to grow. The potting mix should be a well-draining, sandy soil mix that will not retain too much water.
The Repotting Process
1. Water the aloe plant a day before repotting. This will help the plant to settle down and reduce its stress during the repotting process.
2. Put on your gardening gloves to protect your hands from the sharp leaves of the aloe plant. Carefully remove the aloe plant from the current pot by gently pulling it out. If the plant is stuck, use a trowel or a spoon to loosen the soil around the roots.
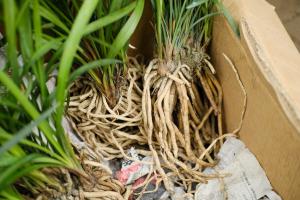
3. Check the roots of the aloe plant to see if they are healthy. Healthy roots should be light-colored, plump, and firm. If the roots are brown, mushy, or smell bad, they are likely rotten, and the plant will need to be removed.
4. Remove any dead or damaged roots using a pair of scissors or pruning shears. Cut as close to the plant as possible, and avoid damaging healthy roots.
5. Add a layer of new potting mix to the bottom of the new pot. Place the aloe plant on top of the new potting mix and fill the rest of the pot with new potting mix. Gently press down the soil around the plant to ensure that it is securely rooted.
6. Water the aloe plant lightly and place it in a bright, sunny spot that is not too hot. You may also add some slow-release fertilizer to the water to encourage healthy growth.
Aftercare
After repotting, continue to care for the aloe plant as you normally would. Give it ample sunlight, good drainage, and water when the soil feels dry. Check the plant occasionally to make sure that it is not getting root-bound or overcrowded. If the plant seems to be outgrowing its pot, it may be time to repot it again.
Conclusion
Repotting an aloe plant is a simple yet essential task that should be done every year or two. By providing the plant with fresh soil and a larger pot, you are allowing it to grow and thrive. With the right tools and some basic knowledge, you can easily repot your aloe plant and enjoy its beauty and health for many years to come.

 how many times do yo...
 how many planted tre...
 how many pine trees ...
 how many pecan trees...
 how many plants comp...
 how many plants can ...
 how many plants and ...
 how many pepper plan...


