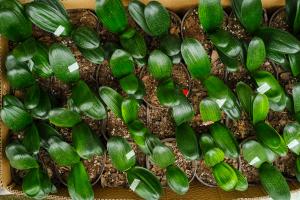
How To Plant Water Lily Bulbs
Water lilies are beautiful flowering plants that thrive in ponds and other aquatic environments. Planting water lily bulbs is a great way to add color and beauty to your pond, while also providing a habitat for fish and other aquatic creatures. In this article, we will explore the steps involved in planting water lily bulbs.
Step 1: Choose Your Water Lily Bulbs
Before you can plant water lily bulbs, you need to choose the right ones. Look for bulbs that are plump and firm, with no signs of damage or rot. Avoid bulbs that are soft, mushy, or discolored, as they may not grow properly.
Step 2: Prepare the Pond
To plant water lily bulbs, you need to have a pond with a depth of at least 18 inches. The pond should also have a planting shelf or container where you can place the bulbs. If your pond lacks a planting shelf, you can create one by placing bricks or rocks on the bottom of the pond.
Step 3: Add Soil and Fertilizer
After you have prepared the pond, add a layer of heavy clay soil to the planting shelf or container. The layer of soil should be about 6 inches deep. Next, add a slow-release fertilizer tablet to the soil, following the manufacturer's instructions.
Step 4: Plant the Bulbs
Now it's time to plant the water lily bulbs. Place the bulbs in the soil, with the pointed end facing up. Cover the bulbs with another 2-3 inches of soil, leaving the tip of the bulb exposed. If you are planting multiple bulbs, space them about 18 inches apart.
Step 5: Cover with Gravel
To keep the soil and bulbs in place, cover the planting area with a layer of gravel. The gravel should be about 1-2 inches deep. This will also help to prevent fish from disturbing the bulbs.
Step 6: Add Water
Now it's time to add water to the pond. Fill the pond gently with water, avoiding any splashing that could displace the bulbs. The water level should be about 2-3 inches above the top of the soil.
Step 7: Monitor and Maintain
After planting the water lily bulbs, be sure to monitor and maintain the pond. Keep the water level consistent, and ensure that the water is clear and clean. You may also want to add additional fertilizer tablets to the soil as the plants grow. Finally, remove any dead or decaying leaves and flowers from the plants to prevent them from rotting.
In conclusion, planting water lily bulbs is a straightforward and rewarding process that adds both beauty and ecological benefits to your pond. With the right bulbs and proper care, you can enjoy a vibrant display of colorful water lilies for years to come.

 how many times do yo...
 how many planted tre...
 how many pine trees ...
 how many pecan trees...
 how many plants comp...
 how many plants can ...
 how many plants and ...
 how many pepper plan...


