How to Plant Marigold Seeds in Cups
If you're looking for a simple and fun gardening project, planting marigold seeds in cups is a great option. Not only are marigolds beautiful and easy to grow, but planting them in cups is a great way for beginners to get started with gardening. In this article, we will walk you through the step-by-step process of planting marigold seeds in cups.
What You Will Need:
- Marigold seeds
- Planting cups
- Good quality potting soil
- Water
- Sunlight
Step 1: Choose Your Cups
The first step in planting marigold seeds in cups is to choose the right cups for the job. You can use just about any type of cup, as long as it has drainage holes in the bottom. Terra cotta pots or plastic planting cups are good options. When choosing cups, keep in mind that marigold seeds will grow to be fairly large, so you'll need cups that are at least 4 inches deep.
Step 2: Fill Your Cups With Soil
Next, fill your cups with good quality potting soil, leaving about an inch of space at the top. Ensure that the soil is moist but not too wet.
Step 3: Plant Your Seeds
Use your finger or a pencil to make a small hole in the soil, about 1/4 to 1/2 inch deep. Drop a marigold seed into the hole and gently cover it with soil.
Step 4: Water Your Seeds
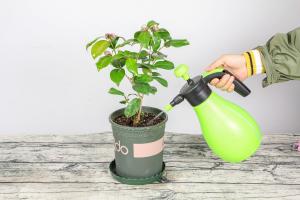
After planting your seeds, water them thoroughly. Be careful not to overwater, as this can cause the seeds to rot. Keep the soil moist but not waterlogged.
Step 5: Provide Sunlight
Marigold seeds require sunlight to germinate, so place your cups in a sunny location, such as a windowsill. Make sure that the cups are getting at least 6 hours of sunlight each day.
Step 6: Maintain Your Plants
As your seeds begin to grow, they will require more water. Be sure to keep the soil moist, but not too wet. Once your seedlings are a few inches tall, you can add a little fertilizer to the soil to ensure that they are getting the nutrients they need. When your plants are large enough, you can transplant them into a larger pot or directly into the ground.
In conclusion, planting marigold seeds in cups is a simple and rewarding project that can be enjoyed by gardeners of all ages and skill levels. With a little bit of preparation and care, you can enjoy beautiful marigold flowers in your home or garden. Happy planting!

 how many times do yo...
 how many planted tre...
 how many pine trees ...
 how many pecan trees...
 how many plants comp...
 how many plants can ...
 how many plants and ...
 how many pepper plan...


