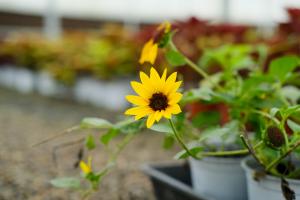
How to Plant Black Eyed Susans
Black Eyed Susans are a beautiful and hardy plant that can add color and vibrancy to any garden. If you're thinking about planting these gorgeous flowers, here's a guide to get you started.
Preparing for Planting
The first step in planting Black Eyed Susans is to prepare your garden bed. Choose a location that gets plenty of sun throughout the day. These flowers thrive in full sunlight, so finding a location with at least six hours of sun each day is crucial.
Next, clear out any weeds, rocks or debris from the garden bed. You'll want to loosen the soil to a depth of 6-8 inches, allowing for better soil drainage and root growth. Add compost or other organic matter to enrich the soil and create a better growing environment for your Black Eyed Susans.
Planting the Flowers
Once your garden bed is prepared, it's time to plant your Black Eyed Susans. Follow these steps for the best results:
1. Plant your flowers in the spring after the last frost date, which is typically in late April or early May.
2. Dig holes that are roughly twice the size of the root ball of your plants, and space the holes about 18 inches apart.
3. Place your Black Eyed Susan plants in the holes, being careful not to damage the roots.
4. Backfill the holes with soil, gently tamping it down to remove any air pockets.
5. Water your plants generously to help them settle into their new home.
6. Add a layer of mulch around the base of each plant, which will help to retain moisture and suppress weeds.
Caring for Your Black Eyed Susans
To keep your Black Eyed Susans healthy and looking their best, there are a few things you'll need to do:
1. Water your flowers regularly, especially during dry periods. Black Eyed Susans prefer moderate moisture and can suffer from drought stress if they don't get enough water.
2. Deadhead your flowers throughout the growing season. This involves removing spent blooms to encourage new growth and prolong blooming.
3. Fertilize your plants with a balanced fertilizer once or twice during the growing season. This will give them the nutrients they need to produce strong stems and vibrant blooms.
Final Thoughts
Planting Black Eyed Susans is a simple and rewarding process. By following these steps and giving your plants the care they need, you'll enjoy beautiful flowers that add color and interest to your garden all season long.

 how many times do yo...
 how many planted tre...
 how many pine trees ...
 how many pecan trees...
 how many plants comp...
 how many plants can ...
 how many plants and ...
 how many pepper plan...


