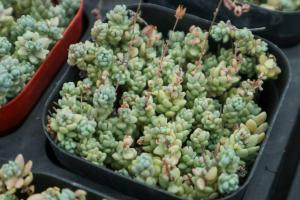
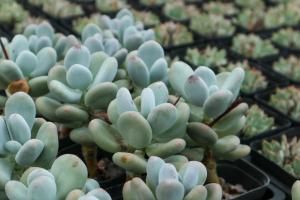
Longevity flower
1 remove the old branches
The older the longevity flower is, the less it blooms. Therefore, if you have a longevity flower that has been raised for several years, you can cut off the stems that have begun to Lignify at the bottom and give birth to new branches as the main branches~

2 remove the bare branches
Longevity flowers can't be exposed to the sun in summer, so some flower friends may live a long life in vain. These bare branches are very thin and weak. Even if they can bloom, they can't bloom too much
At this time, the branches should be shortened appropriately

3 pick the heart
If you want to live a long life, you should naturally pick your heart~
For example, in the figure below, the part marked with red circle can be pinched off~
Jasmine
Cut off the flowering branches
The branches that have been in bloom must be cut off after the flowers fade. One is to avoid excessive nutrient loss, and the other is to be beautiful
After jasmine flowers bloom, count 2 ~ 3 pairs of leaves from bottom to top, and then cut them off. All branches leave only 2 ~ 3 pairs of leaves

2 cut off the bare branches
The reasons for the excessive growth of branches are lack of light and too much water. For jasmine, the excessive growth of branches will disperse nutrients and cause waste
Therefore, when you see a long, very high branch, don't be soft, just cut it off! Just leave 2 ~ 3 pairs of blades at the bottom

3 cut off overlapping branches
Overlapping branches, in fact, are mainly dense branches inside. For example, the part of X in the figure below, some are crossed and some are overlapped, which is very unfavorable to the growth of jasmine
Therefore, those that draw X and mark numbers should be cut off. Oh, don't be reluctant. Only when you cut them can they grow better

4 cut off the dry and aged branches
Generally, 3-5-year-old Jasmine blooms the most, and the amount of jasmine beyond this age will decrease year by year. Therefore, it is necessary to re cut and update the branches~
A and B in the figure below belong to 4-5-year-old branches with weak germination ability. They can be removed to make D and C become new main branches

5 cut off the sick branches
Some branches infected with diseases and insect pests should be cut off as soon as they are found
For example, the yellow and black branches in the figure below, once found, cut them off immediately! Don't leave any
Osmanthus fragrans
1 cut off the thin branches
On some stronger branches, some smaller branches will grow. These branches should be cut off in time, because these branches can not bloom, and even divide nutrition, resulting in waste, so they must be cut off
Look at the figure below. Where the flowers draw the red line, the branches are weaker than others. Staying on them is also a waste of nutrition, so they need to be removed~

2 cut off overlapping branches
Overlapping branches, in fact, can also be called parallel branches, which grow in the same direction and are very close to each other
Such overlapping branches need to be removed from one of them. For example, the part of the wreath in the figure below can be removed from the bottom overlapping branch~

3 cut off the crossed branches
The so-called Cross branches, you can refer to the part circled in the figure below. If this happens to your cinnamon tree, it is cross branches
For Cross branches, you can choose the branch with strong bending and cut it off. For example, in the figure below, Huahua suggests cutting off the branch with left bending below

4 cut off too dense branches
There are some dense branches inside. If you don't ask, the branches will be longer and more dense. They will not only lack ventilation, but also block the light. If this goes on for a long time, it is easy to make osmanthus ill
For example, in the figure below, the branches and leaves of the wreath are very dense, and some are very thin, which is not conducive to flowering. Therefore, one third of the branches can be appropriately removed

5 cut off the internal branches
To put it bluntly, the internal lateral growth or downward growth branches of Osmanthus fragrans should be cut off, because such branches will affect the plant type of Osmanthus fragrans~

Green Rose
Cut off too long branches
If you don't like the green rose growing too long, you can cut off the long part of the green rose regularly~
Attention, don't throw away the cut branches. Take them to cuttings after drying in the shade, and they will soon take root and grow new branches~
There is nothing particularly fixed about the position of trimming. Just cut it according to the length you like~
2 cut off the dried branches
With the growth, there will inevitably be some dry branches at the bottom of the green rose. This kind of branches left on it will not be of any use, but will gradually rot. if you are not careful, it is even easy for the green rose to be infected with bacteria, so you must remove them in time
3 cut off the yellow leaves
It is useless to leave the yellow leaves on it. It will also waste nutrition, so cut them off in time~

Happiness tree
1 cut off all the drooping branches and leaves
In the process of breeding happiness tree, you may also encounter some problems. For example, in the figure below, the branches and leaves of happiness tree are all drooping
Cut off all the branches and leaves in the picture, leaving only the two thickest trunks
Then put it in a cool and ventilated place for maintenance, waiting for the re growth of branches and leaves
2 cut off the bare branches
If the happiness tree is placed indoors for a long time, its branches will grow in vain. In this case, it is necessary to shorten the branches in vain to avoid growing too high and finally falling down
The specific trimming position can be seen at the red line in the figure below~

Camellia
1 cut off over dense branches
▼ the distance between a and B is very close
B. C branches are parallel to each other and close to each other. C branches can be cut off
▼ as shown in the figure, the distance between the branches at the top is very close. You can remove all the branches marked with X in the figure below
After pruning
▽
2 cut off the necrotic branches
▼ sometimes, some branches of Camellia will dry up, and the place where the top sprouts will also die

In this case, the necrotic part at the top needs to be removed and cut off from the double arrow in the figure below. Because there are complete new buds under the double arrow
Comparison chart after trimming
▽

3 cut off the lower leg branch
▼ A and B are the lower branches, which are the thin branches growing from the very bottom, which will consume the nutrients of Camellia. Therefore, cut them from the place close to the branches

▼ in the following figure, red is marked × The part of the lower leg branch is also a kind of lower leg branch, which is much weaker than the upper A and B branches. Keeping it also consumes nutrients and needs to be cut off

Comparison chart after trimming
▽

4 cut off overlapping branches
▼ the overlapping young branches sprouted on the main rod can be considered to be cut off to reduce the consumption of nutrients. Conghong × And the place marked by the double arrow

5 erase axillary buds
▼ the dense branches at the top can be removed, and the branches with red fork are pruning tips; The arrow shows axillary buds, which should be erased at the same time

Comparison diagram after trimming
▽

▼ the leaf buds that cannot grow normally should be cut off, and the position shown by the double arrow is the pruning prompt

▼ the downward and horizontal leaf buds should be erased. The leaf bud shown by the arrow grows downward and cannot receive enough light, so it can be cut off directly

▼ the arrow shows the lateral (auxiliary) buds, which should be erased. If the buds are not wiped in time, parallel thin and weak branches will be produced. You can see the second picture below

If you don't erase it, it will eventually grow into the following figure. The thin branch on the left is the branch from the side bud, while the strong one is the branch from the main bud. At this time, the thin branch on the left should also be removed. The lateral buds on strong branches should also be removed

Comparison chart after trimming
▽

▼ the overlapping horizontal buds behind the flowers should be cut off, which is the one pointed by the arrow

Cut off the flower branches
▼ branch a is the branch that has already blossomed in that year. It will consume nutrition after flowering. It should be cut off from the red x part in the figure below
There are axillary buds at the arrow, which should also be erased

7 branches left
▼ just leave 1-2 branches on each strong branch, which is useless. For example, the part painted red XD in the figure below should be erased
A branches can be left or removed, depending on your preference

8 too high branch retraction
▼ if the branches are too high, they should be retracted and pruned, so that new buds will sprout at the branches below the scissors, and the whole plant will become very plump
Trim to the part indicated by the double arrow

Gardenia jasminoides
1 sparse branch
Cut off weak branches
▼

Cut off overlapping branches
▼

Cut off the buds on both sides of the flower bud, because they will compete with the flower bud for nutrients
▼

2 cut off the remaining flowers
When pruning residual flowers, start from the second section below the flowers
▼

If you find small buds on both sides of the bud, you'd better cut them off at that time, but if you forget, you can also remove them when pruning the remaining flowers
▼

Effect drawing after trimming
▼

Lateral bud germination after pruning
▼


 how many times do yo...
 how many planted tre...
 how many pine trees ...
 how many pecan trees...
 how many plants comp...
 how many plants can ...
 how many plants and ...
 how many pepper plan...