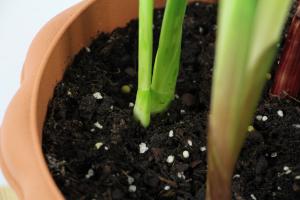
How do you plant garlic in pots?
Garlic is a flavorful and nutritious vegetable that is easy to grow in pots. When planted correctly, garlic can thrive in a container garden and produce delicious garlic bulbs that can be used in a variety of dishes. If you are interested in planting garlic in pots, here are some simple steps that you can follow to get started.
Step 1: Choose the right container and soil
The first step to planting garlic in pots is to choose a suitable container and soil. For best results, choose a container that is at least 10 inches deep and 12 inches wide. You can use any type of container that has good drainage, such as a plastic container, terracotta pot, or wooden box.
The soil should be well-draining and fertile. You can use a potting mix that is specifically formulated for container gardening, or you can use a mixture of equal parts potting soil, compost, and perlite.
Step 2: Choose healthy garlic bulbs
Next, select healthy garlic bulbs that are plump and firm. Avoid bulbs that are soft, moldy, or have green shoots growing out of them. You can purchase garlic bulbs from a gardening store or online, or you can save cloves from garlic bulbs that you have purchased from the grocery store.
Step 3: Prepare your garlic bulbs
Before planting your garlic bulbs, you should prepare them by separating the cloves from the bulb. Gently break the bulb into individual cloves, and remove any papery outer layers. Each clove should be planted with the pointed end facing up.
Step 4: Plant your garlic cloves
Now, it's time to plant your garlic cloves in the soil. Make sure that the soil is moist, but not soaking wet. Create holes that are 2 inches deep, and space the garlic cloves about 6 inches apart. Place each clove pointed end up in a hole, and cover with soil.
Step 5: Provide proper care
After planting your garlic cloves, you need to provide them with proper care to ensure that they grow healthy and strong. Water them regularly, but avoid overwatering. Garlic prefers moist soil, but it should not be waterlogged.
Garlic also requires full sun, so place your container in a location that receives at least six hours of sunlight per day. If you live in a hot climate, you may want to place your container in a partially shaded area to prevent the soil from becoming too dry.
In addition to water and sunlight, you should also fertilize your garlic plants every two to three weeks with a balanced fertilizer. This will provide your plants with the nutrients they need to grow strong and produce large, flavorful garlic bulbs.
Step 6: Harvest your garlic bulbs
Garlic is ready for harvest when the leaves begin to turn yellow and die back. This typically occurs in late spring or early summer, depending on when you planted your garlic cloves.
To harvest your garlic bulbs, gently dig them up using a garden fork or trowel. Be careful not to damage the bulbs as you remove them from the soil. Once harvested, you can dry your garlic bulbs in a cool, dry place for a week or two before using them in your favorite recipes.
Planting garlic in pots is a fun and rewarding way to grow your own fresh garlic at home. By following these simple steps, you can successfully grow garlic in a container garden and enjoy the delicious flavor of this versatile vegetable.

 how many times do yo...
 how many planted tre...
 how many pine trees ...
 how many pecan trees...
 how many plants comp...
 how many plants can ...
 how many plants and ...
 how many pepper plan...


