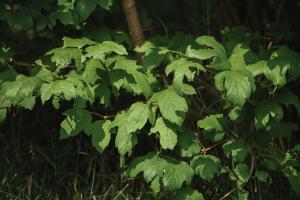
How to Plant an Espalier Tree
Espalier trees are a beautiful addition to any garden or outdoor space. Not only do they offer the benefits of fruit production, but they also add structure and style to a garden. But how do you plant an espalier tree? Here’s a step-by-step guide to help you out.
Step 1: Choose the Right Tree
The first step in planting an espalier tree is to choose the right tree. Look for a tree that is disease-resistant and well-suited to your region. Apple, pear, and peach trees are popular choices for espalier techniques. When choosing your tree, make sure it has a straight trunk and a healthy root system. It’s also important to select a tree that is younger and small, as they are easier to manipulate and train for the espalier technique.
Step 2: Choose Your Espalier Design
There are a variety of espalier designs to choose from, so it’s important to decide which one you want before you begin planting the tree. Some common designs include cordon, fan, and Belgian fence. Once you’ve chosen your design, mark out the lines with strings or stakes to ensure that your tree is planted in the right location.
Step 3: Plant Your Tree
Before planting your tree, make sure you create a hole that is twice as wide as the root ball and deep enough to accommodate the entire root system. The hole should be prepared with compost, manure, or other organic matter. Once the hole is ready, carefully lower the tree into it and add soil around the root ball, gently tamping it down to remove any air pockets. Be sure to water the tree thoroughly after planting.
Step 4: Install Your Support System
Espalier trees need a support system to grow correctly. You can use posts, wire, or trellises to create the necessary structure. If you’re planning to use wire, make sure it’s non-corrosive and has enough tension to hold up the tree as it grows. Install the support system as soon as possible after planting the tree, ensuring that it’s secured firmly in place.
Step 5: Begin Training Your Tree
Training your tree takes patience and time. Begin by tying the main stem to the support system with soft ties, ensuring that it’s straight and secure. As the tree grows, attach each new branch to the support system, trimming off any side shoots until it reaches the desired length. Once you’ve created the basic framework, continue to prune and shape the tree as needed to maintain the design.
Step 6: Care for Your Tree
Espalier trees require regular care to ensure they grow healthy and produce fruit. Water your tree regularly during the growing season, and fertilize it with a balanced fertilizer in the spring and summer. Prune the tree regularly to remove dead or damaged branches and to control its shape. Finally, watch for pest and disease problems and take action quickly to prevent them from spreading.
With a little patience and care, planting an espalier tree can be a rewarding experience that yields delicious fruit and beautiful aesthetics in your garden or outdoor space. By following these steps and investing time in your tree, you’ll have a beautiful and productive espalier tree in no time.

 how many times do yo...
 how many planted tre...
 how many pine trees ...
 how many pecan trees...
 how many plants comp...
 how many plants can ...
 how many plants and ...
 how many pepper plan...


