How to Plant a Tree in a Container
Planting trees in containers is a great way to add greenery to your home, patio, or balcony. It is also an excellent option for those who want to grow trees but have limited outdoor space. In this article, we will guide you through the process of planting a tree in a container.
Step 1: Choose the Right Container
The first step in planting a tree in a container is selecting the right container. The container should be large enough to accommodate the tree's root system and allow room for growth. The container should have drainage holes to prevent water from pooling and causing root rot.
When selecting the container, consider the type of tree you want to plant, as some trees have larger root systems than others. Also, consider the material of the container. Clay and concrete containers are heavy, while plastic containers are lightweight and easier to move. Lastly, consider the overall aesthetic of your space, and choose a container that complements it.
Step 2: Choose the Right Tree
The second step is choosing the right tree for your container. Not all trees are suitable for container gardening. Dwarf varieties of fruit trees, Japanese maples, and ornamental trees are ideal for containers. These trees are slow-growing and do not require as much space as traditional trees. They also add an element of beauty to your space.
You should also consider the climate in your area. Some trees are better suited to cold climates, while others thrive in warm climates. Choose a tree that is compatible with your climate so that it can flourish in your container.
Step 3: Prepare the Container
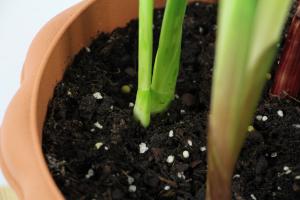
The third step is preparing the container for planting. Begin by covering the drainage holes with broken pottery or stones to prevent soil from washing out. Then, fill the container with soil. Use a soil mix that is specifically designed for container gardening, as this will provide the necessary nutrients for your tree to grow.
Add a slow-release fertilizer to the soil, following the instructions on the package. This will provide your tree with the nutrients it needs to grow healthy and strong. Finally, create a hole at the center of the container, large enough to accommodate the root ball of the tree.
Step 4: Plant the Tree
The fourth step is planting the tree in the container. Begin by removing the tree from its original container or packaging. Gently tease the roots apart to encourage them to spread out. Place the tree in the hole you created in the container, ensuring that the top of the root ball is level with the soil surface.
Fill the container with soil to just below the rim, tamping it down firmly around the root ball. Water the tree thoroughly, allowing the water to soak in slowly. Add more soil as needed to bring the soil level up to the rim of the container.
Step 5: Care for the Tree
The final step is caring for your tree in the container. Position the container in a location that receives the appropriate amount of sunlight for your tree. Water the tree regularly, ensuring that the soil remains moist but not waterlogged. Fertilize the tree periodically, following the instructions on the package.
Prune the tree as needed to maintain its shape and size. Keep an eye out for pests and diseases. If you notice any problems, treat them promptly to prevent them from spreading to other plants.
Conclusion
Planting a tree in a container is a wonderful way to bring nature into your home or outdoor space. With the right container, the right tree, and proper care, your tree will thrive and add beauty to your surroundings for years to come.

 how many times do yo...
 how many planted tre...
 how many pine trees ...
 how many pecan trees...
 how many plants comp...
 how many plants can ...
 how many plants and ...
 how many pepper plan...


