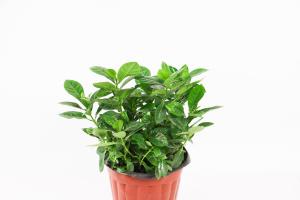
How to Paint Plastic Pots for Pot Plants
Plastic pots are a popular option for pot plants as they are lightweight, durable and easy to move around. However, they often come in plain and boring colors that don't add much to the aesthetics of your indoor or outdoor space. The good news is that painting plastic pots is an easy and affordable way to add some personality and beauty to your garden or home. In this article, we will guide you through the steps of painting plastic pots for pot plants.
Step 1: Choose the Right Paint
The first step to painting plastic pots is to choose the right paint. It is essential to select a paint that is designed specifically for plastic surfaces, as regular paint won't adhere well to plastic and will peel off easily. Look for spray paint or acrylic paint that is labeled for use on plastic. You can find a wide range of colors and finishes, from matte to glossy, which can transform the look of your plastic pots.
Step 2: Clean the Pots
Before painting, it is crucial to clean the plastic pots thoroughly. Dust, dirt, and grime buildup can prevent the paint from adhering correctly to the surface of the pot, resulting in uneven coverage and peeling. Use warm soapy water and a scrub brush to remove any dirt or debris from the pots. Rinse in clean water and allow pots to dry completely before proceeding to the next step.
Step 3: Prime the Pots
Priming the plastic pots will help to create a strong adhesion bond between the surface of the pot and the paint, ensuring long-lasting results. Apply a thin coat of plastic primer to the pots using a spray can, brush or roller. Spray paint is the easiest method for priming plastic pots but is more expensive than brushing or rolling. Follow the manufacturer's instructions on how long to wait before applying the topcoat of paint.
Step 4: Apply the Paint
Now it's time to apply the topcoat of paint to the plastic pots. Follow the same process as priming the pots, either by using spray paint, brush or roller. Hold the spray can at least 6 inches away from the pots and apply thin and even coats of paint. Don't apply too much paint at once as it can result in clumps and drips. Allow each coat to dry completely before applying the next coat until you achieve the desired color and coverage.
Step 5: Add a Protective Coating
Once the topcoat of paint has dried, you can add a protective coating to the pots to increase their durability and resistance to the elements. A clear sealant will help to prevent paint from chipping, cracking or fading, and will make the pots easier to clean. Apply the sealant using a spray can, brush or roller and allow it to dry completely before moving it to its intended location.
Conclusion
Painting plastic pots for pot plants is an easy and fun DIY project that can add a personal touch to your garden or indoor space. By following these simple steps, you can transform boring and drab plastic pots into colorful and vibrant pieces of art that reflect your style and personality. With the right paint, preparation, and technique, you can create a stunning and unique display of pot plants that will bring joy and beauty to your life for years to come.

 how many times do yo...
 how many planted tre...
 how many pine trees ...
 how many pecan trees...
 how many plants comp...
 how many plants can ...
 how many plants and ...
 how many pepper plan...


