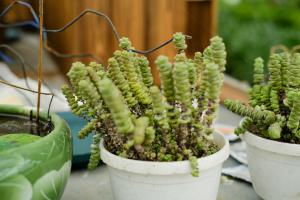
How to Paint Plant Pots at Home
Painting plant pots is an easy and affordable way to add some creativity and personal style to your indoor and outdoor greenery. Not only does it allow you to customize the look of your planters, but it can also give old pots a new lease of life, making them look brand new. Painting plant pots is an enjoyable activity that can be done by anyone, regardless of their artistic skill level. In this article, we will guide you through the steps to paint plant pots at home.
Step 1: Choose the Right Pots and Paint
Before you start painting, you need to choose the right pots and paint. Terra cotta pots are a popular choice as they are affordable and easy to find. However, you can also paint plastic or ceramic pots. When selecting your paint, make sure that it is suitable for outdoor use and can withstand water and UV rays. Acrylic paint is an excellent option as it dries quickly, and it is water-resistant.
Step 2: Prepare the Pots
The next step is to prepare the pots. Clean them thoroughly with soap and water to remove any dirt or debris. If your pots have old paint on them, you will need to strip the paint using paint stripper. Once you have cleaned the pots, allow them to dry completely before you start painting.
Step 3: Paint the Pots
Now it's time to paint the pots. You can use a paintbrush, a roller, or even spray paint to apply the paint. If you are using spray paint, make sure to apply it in a well-ventilated area and wear a mask to protect yourself from fumes. Apply a thin coat of paint and allow it to dry before applying another coat. Repeat this process until you achieve the desired color and coverage.
Step 4: Add a Design or Pattern
If you want to add a pattern or design to your painted pots, you can use stencils or painter's tape to create shapes or stripes. You can also use stickers or decals to add some flair. Be creative and experiment with different designs to achieve a unique and personalized look.
Step 5: Seal the Pots
Once you have finished painting and decorating your pots, it's essential to seal them to protect the paint from wear and tear. You can use a clear acrylic sealer to create a protective coat. Apply the sealer to the pot in thin coats, allowing each layer to dry before applying the next one.
Conclusion
Painting plant pots is a fun and easy DIY project that can add a touch of style and personalization to your indoor and outdoor spaces. Follow these simple steps, and you will have a collection of unique and beautiful planters in no time. Not only will you have fun creating them, but you will also enjoy their beauty for years to come.

 how many times do yo...
 how many planted tre...
 how many pine trees ...
 how many pecan trees...
 how many plants comp...
 how many plants can ...
 how many plants and ...
 how many pepper plan...


