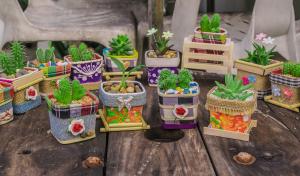
How to Make Your Own Plant Pots from Clay
Plant pots made from clay are not only practical but also make a beautiful addition to any indoor or outdoor garden. If you have a passion for gardening and are looking for a DIY project, making your own plant pots from clay can be a fun and fulfilling activity. Here are the steps you need to follow:
Step 1: Gather Materials
Before you start making your plant pots, you will need the following materials:
Clay (air-drying or firing clay)
Water
Rolling pin or slab roller
Clay cutting tool
Measuring tool
Template or stencil
Sponge or brush
Plastic wrap
Drying rack
Step 2: Prepare Clay
If you are using air-drying clay, you can skip this step. But if you are using firing clay, you need to prepare it by kneading and removing any air bubbles. Then, add water slowly until you reach a desirable consistency that is easy to work with.
Step 3: Roll Out Clay
Using a rolling pin or slab roller, roll out the clay to a thickness of around 1/4 inch.
Step 4: Cut Clay into Desired Shape
Using your template or stencil, cut out the clay into the desired shape for your pot. Be sure to measure and cut evenly for an attractive look.
Step 5: Mold Clay into Pot Shape
Using your hands, carefully mold the clay into the shape of your pot, making sure to smooth out any imperfections as you go.
Step 6: Add Drainage Holes
Using a clay cutting tool, carefully poke 2-3 small holes in the bottom of the pot for drainage.
Step 7: Let Clay Dry
Allow your clay pot to dry on a drying rack for at least 24 hours. Cover with plastic wrap to ensure even drying.
Step 8: Decorate and Paint (Optional)
If desired, you can add decorative touches to your pot using paint or other embellishments. Let the paint dry completely before proceeding.
Step 9: Enjoy Your New Clay Plant Pot
Your new clay plant pot is now ready to use! Add soil and your favorite plant and watch it grow.
Making your own plant pots from clay is a rewarding DIY project that can be enjoyed by everyone, regardless of skill level. With a little patience and creativity, you can create beautiful plant pots that will enhance the beauty of your garden and plants.

 how many times do yo...
 how many planted tre...
 how many pine trees ...
 how many pecan trees...
 how many plants comp...
 how many plants can ...
 how many plants and ...
 how many pepper plan...


