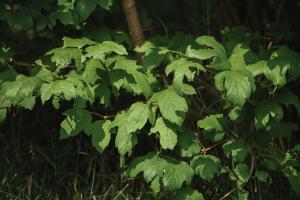
How to Plant Plumeria Tree Branch
Plumeria is a beautiful and fragrant tropical tree that is often grown for its colorful and fragrant flowers. One of the easiest ways to propagate plumeria is by growing it from a branch cutting. Here is a step-by-step guide on how to plant a plumeria tree branch.
Step 1: Selecting the Right Branch
The first step is to select the right branch to cut. Choose a healthy branch that is at least 12 inches in length. Make sure it is free of any diseases or pests. The branch should have at least two nodes, which are the small bulges on the branch where new leaves and roots will emerge.
Step 2: Preparing the Cutting
Use a sharp, clean pruning shears to cut the branch at a 45-degree angle. The angle will help prevent water from pooling on the cut end of the branch, which can lead to rot. Let the cutting dry for a day or two to allow the cut end to callus over.
Step 3: Preparing the Potting Soil
Plumeria prefers well-draining soil. Mix equal parts of perlite and sand with well-aged compost. This potting mix will provide the right balance of drainage and nutrients for the plumeria plant.
Step 4: Planting the Branch Cutting
Fill a pot with the potting mix, leaving about 2 inches of space at the top. Insert the cutting into the soil, burying the bottom node completely in the soil. Firm the soil around the cutting to provide support. Water the pot well, but avoid over-watering. Keep the pot in a warm and sunny location, but out of direct sunlight.
Step 5: Caring for the Plumeria Cutting
It is important to keep the soil moist but not wet. Do not over-water the plant as this can lead to root rot. Water the pot once a week or when the soil feels slightly dry to the touch. Fertilize the plumeria with a balanced fertilizer once every two weeks.
Step 6: Transfer to a Larger Container
When the branch cutting starts to grow new leaves and roots, you can transfer it to a larger pot. Use a pot that is about 2 inches wider than the previous pot. Fill the pot with the same potting mix as before and place the plant in the center of the pot. Firm the soil around the plant and water well.
Step 7: Patience and Care
Plumeria plants take time to mature and grow. It can take up to three years for the plant to start producing flowers. Keep the plant in a warm, sunny location and provide it with good care and patience, and you will be rewarded with beautiful and fragrant plumeria flowers.
In conclusion, planting a plumeria tree branch is an easy and rewarding way to propagate this lovely tropical tree. With just a few simple steps, you can transform a plumeria branch into a beautiful and fragrant addition to your garden.

 how many times do yo...
 how many planted tre...
 how many pine trees ...
 how many pecan trees...
 how many plants comp...
 how many plants can ...
 how many plants and ...
 how many pepper plan...


