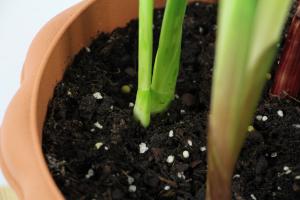
How to Plant Water Lilies in a Container
Water lilies are beautiful and elegant aquatic plants that add charm to any outdoor space. Growing water lilies in a container is a great way to bring this beauty to your patio or balcony. Planting water lilies in a container is relatively easy, and it does not require a lot of space. Here is how you can plant water lilies in a container.
Choose the Right Container
When it comes to choosing the right container for water lilies, always go for a wide and shallow container that is at least 18-20 inches deep. A container that is too deep may not be suitable for water lilies' roots. The pot should have holes at the bottom for drainage purposes. Clay, plastic, or fiberglass pots are a good option for planting water lilies.
Choose the Right Soil Mix
It is essential to choose the right soil mix for planting water lilies. A good soil mix for water lilies should be loamy, hold water, and be slightly acidic. You can mix garden soil, loam, and sand to make the soil mix. Make sure the soil is free of mulch, compost, or organic matter that can attract pests and decay quickly.
Add Fertilizer
Water lilies require nutrients to grow healthy and bloom. Adding fertilizer to the soil mix is crucial for water lilies. You can use slow-release fertilizers or organic fertilizers that release nutrients gradually over time. Be sure to follow the manufacturer's instructions to avoid over-fertilizing, which can damage the plant.
Plant the Water Lily
Once you have your container, soil mix, and fertilizer ready, you can plant your water lily. Place the soil mix in the container, filling about 2/3 of the pot. Ensure there is enough space to add the water lily. Place the water lily in the container, arranging its roots carefully. Ensure the water lily sits upright in the soil mix. Add more soil mix around the roots, enough to cover them. Be sure to leave about an inch of space from the top of the container for adding water later.
Add Water
Water lilies require a lot of water to thrive. Fill the container with water to cover the roots and reach the top of the soil mix. Avoid adding chlorine or hard water to the container, as it can be harmful to the plant. If possible, use rainwater or distilled water, which is ideal for watering water lilies. Ensure the water is always above the soil level and the plant's crown at all times.
Place the Container in the Right Spot
Water lilies require plenty of sunlight to grow and bloom. Place the container in an area that receives at least 6 hours of sunlight per day. Avoid placing the container near trees, which can shade the plant and make it difficult to grow. Make sure the plant is not exposed to bright, direct sunlight, which can cause the water to evaporate quickly and damage the leaves.
Maintain the Plant
Maintaining the water lily is crucial for its growth and health. Ensure you keep the water clean and change it regularly to avoid the accumulation of algae or bacteria. Remove any dead or damaged leaves to prevent them from attracting pests or decaying, which can harm the plant. Fertilize the plant regularly to boost its growth and bloom. When winter comes, remove the water lily from the container and store it in a cool, dry place until spring.
Conclusion
Planting water lilies in a container can be a fun and rewarding experience. By following these simple steps, you can grow your own water lilies and enjoy their beauty in your outdoor space. Remember to choose the right container, soil mix, and fertilizer, and place the container in the right spot to ensure your water lilies thrive.

 how many times do yo...
 how many planted tre...
 how many pine trees ...
 how many pecan trees...
 how many plants comp...
 how many plants can ...
 how many plants and ...
 how many pepper plan...


