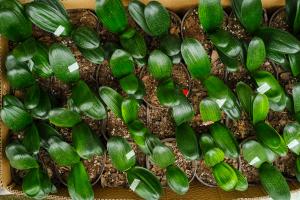
How to Plant Water Chestnuts in Pots
Water chestnuts, also known as Eleocharis dulcis, are aquatic plants that are often used in Asian cuisine. They have a deliciously crunchy texture and a mild, slightly sweet flavor that is highly prized in many dishes. Growing water chestnuts is relatively easy, and with the right conditions, they can be grown in pots right in your own home. In this article, we’ll discuss the steps involved in planting and growing your own water chestnuts in pots.
Choosing the Right Pot and Location
The first step in planting water chestnuts in pots is to choose the right container. While they can be grown in the ground, growing water chestnuts in pots is more manageable and ensures that the plant remains hydrated. Plastic, terra cotta, or ceramic pots that have drainage holes are ideal for growing water chestnuts. The pot should be between 12 and 18 inches in diameter and at least 8 inches deep. When it comes to choosing the right location, water chestnuts prefer full sun, so pick a spot that receives at least 6 hours of direct sunlight per day.
Preparation and Planting
Before planting your water chestnuts, it’s crucial to soak the corms (underground stem) in water overnight. Once they are fully soaked, rinse them thoroughly before placing them in 3-4 inches of clean, coarse sand at the bottom of the pot. Add a layer of well-draining soil on top of the sand, filling the pot to about 2 inches below the rim. Place the corms on top of the soil, spacing them out about 4 inches apart. Cover with approximately 1-2 inches of additional soil and add water until it reaches the top layer of soil.
Watering and Fertilization
Water chestnuts need to be kept consistently moist throughout the growing process. At minimum, water chestnuts require 2-3 inches of water per week, with additional water added if the soil starts to dry out. Be sure to water the entire pot evenly and avoid letting the water sit for a prolonged time at the bottom of the pot as it may cause root rot. In terms of fertilization, water chestnuts require a high-nitrogen fertilizer to promote healthy growth. Use a balanced fertilizer like 10-10-10 or 20-20-20 once a week, following the instructions on the package.
Harvesting and Storage
Water chestnuts generally take around 6-8 months to mature, depending on the climate and growing conditions. Once the leaves start to yellow and die off, it’s an indication that the water chestnuts are ready to be harvested. Carefully dig them up and remove the corms from the soil. Rinse them in cool water and let them dry for a few days before storing them in a cool, dry place. Water chestnuts can last for up to several weeks in the fridge and up to a year in the freezer.
Conclusion
Planting water chestnuts in pots is a rewarding and enjoyable process that can provide you with delicious and fresh ingredients for your favorite Asian dishes. Be sure to choose the right pot and location, carefully prepare and plant the corms, and provide consistent watering and fertilization throughout the growing process. With a little bit of patience and care, you can enjoy the fruits of your labor with a rich bounty of fresh, crunchy water chestnuts.

 how many times do yo...
 how many planted tre...
 how many pine trees ...
 how many pecan trees...
 how many plants comp...
 how many plants can ...
 how many plants and ...
 how many pepper plan...


